6 min irakurketa
🏆 3 Key Things I do When I Start a New Website · The Bunker #78
Hi friend 👋🏻!
Welcome to The Bunker.
A Newsletter in which we talk about UX Design and the Freelance Journey, dedicated to those who are starting out in both worlds and who feel identified.
From The Bunker, we accompany you on the way.
🎁There's a gift thanks to the sponsor of today's newsletter.
Lately, I've been creating about 2-3 websites per month, whether it's for Webflow Templates or for a client.
The other day while having lunch in the office, I thought, it's true that every time I start a new project, I always end up going through the same processes. It would be interesting to share the processes I follow in case anyone is interested in learning about my workflow.
Step number 1: Decide what type of website I want to make
Although it may sound obvious, this step is fundamental. It helps me determine what the website will look like at the end of the process.
This step is to determine the type of website I will end up creating: Real estate, template for Notion creators, interior design, architecture?
Usually, when I choose the type of project I'm working on, I already have in mind the style I should follow for that website. For example, when I think about a website for architecture or a website for Notion, I already have a clear idea of the styles I will be following.
Obviously, it doesn't have to be this way. I could make an architecture website in the style of Notion, and on the Notion website, use the architecture style. But I already have an idea from the beginning.
✨ This Week’s Sponsor
Koala UI is a Design System built for users who are looking to create uniquely beautiful websites with highly converting structures and SEO optimization.
-
10+ About pages
-
10+ Blog article
-
10+ Blog page
-
10+ Career Pages
-
Ecommerce products display
-
+24 More
Get 20% off by being a The Bunker reader: “THEBUNKER20” koalaui.com
Step number 2: Define the visual aesthetics
Once I'm clear about what type of project I want to do, the next thing I do immediately is to think about the visuals, the high-fidelity wireframes, the final style.
I know some of you might find it strange that I'm thinking about this already when it's usually the final step.
But this is even something I do when I'm thinking about what type of website to create.
At the end of the day, I'm a designer with a portfolio who needs to showcase my work to the world. Right now, my priority is that the design I create has to be beautiful.
Obviously, the structure and content will be crucial, but what will pique people's curiosity will be the visuals.
When I define a visual style or find a style that I like or can think, "Okay, I can use this, now I know what I want to do," then I start thinking about structure.
By defining structure with the visuals in mind, it helps me define the final layout.
For example: If the style I want to create is minimalist with stripes, when I create the structure, I'll take this into account. If my style is based on bento boxes, then I'll have to consider this when creating the structure.
To define the visuals I want, I simply go to my mood boards and review styles from other people that I've saved. Then, I decide whether to do the same, mix styles, or draw inspiration from various sources. I just take a tour through the +5000 captures I have saved.
Pinterest is also a great place to store designs and then define aesthetics.
Step number 3: Structure
Finally, I define the structure I want to have based on the visuals I've decided to choose.
This step can vary depending on the project: If it's a project for a client, initially the structure will be very basic, a layout where I can show the client:
-
Hero section
-
Logos section
-
Features section
-
CTA section
-
Contact section
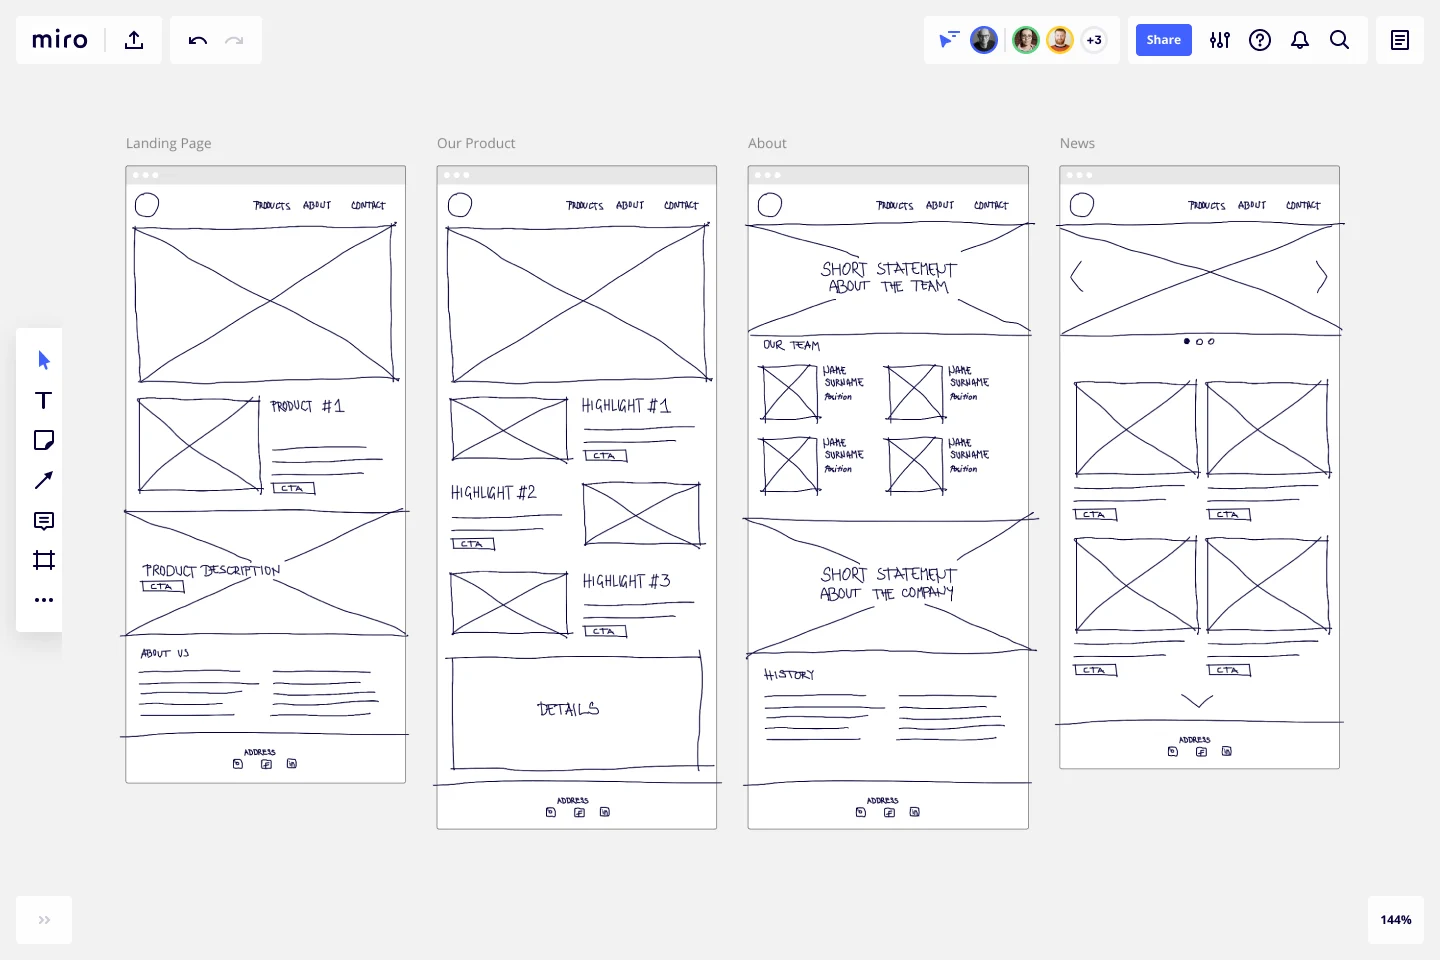
When the client gives me the final approval for the structure, then I focus on the details.
-
What kind of Hero do I want? (There are a thousand ways to create hero sections).
-
What kind of logos section? (There are a thousand ways to create logo sections).
-
Etc, etc
This is a screenshot of 20+ Hero Sections available at Koala UI.
If I'm the client, meaning I'm creating a template, then I go straight to the second step.
I would do the first step when there's a risk of wasting a lot of time with the client; it's always better to go slowly, define a little, and then go into detail.
For the past few months, I used to deliver structures of this style to clients.
But now that I have KoalaUI, I can define the structure but with high-definition visuals, and I always mention: These are not the final styles or structure; this is just for you to get an idea of the structure.
Clients understand structures much better with more realistic visuals than with gray-scale boxes.
Then the result can be drastically different from what I delivered with Koala, but from the beginning, I save myself problems.
On the other hand, to define the structure, that is: How many sections do I need, how many pages do I need, for this, I dedicate myself to searching for references on other websites and studying what others do.
For example: In Notion's websites, it's very typical to:
-
Start by showing the product
-
Quickly put in the numbers (copies sold, number of pages, etc).
-
Then the logos, or trusted social testimonials
-
Then the features
-
Then the entire content
-
Then the CTA
-
Then the footer
With this, I get a slight idea of the sections I'll need, and with Koala, I drag and drop what I need and then when I have all the structures set up, I focus on applying the final styles that I defined in step number 2.
Conclusion
-
Choose what type of project I want to do
-
Choose the visuals or aesthetics I want to follow
-
Define the structure and pages
I hope this has inspired you in some way.
🎁 I’ve Published my First Book!
If you are interested on making a living with Content Creation, I’m thrilled to announce that I’ve recently release my book: From $0 to $10.000 on client projects with only 10.000 followers on Instagram”.
📸 I’ve launched my New Preset Pack
Get 20% off by being a The Bunker reader: “THEBUNKER20”. Download preset
🔖 The Bunker Bookmarks
🖊️ My portfolio
📕 The Ultimate Guide to Choose the Right Typeface · Workbook
🧠 Second Brain for Creatives · Free Download
📕 Typography is for everbody™ · Free Download
💖 Favorite icon pack.
🎨 Favorite Color Generator.
🤹🏻 My Equipment
✱· Most Productive Designer Mouse
✱· Office chair
✱· Sony A7IV